How To Add Adobe Fonts To Your Squarespace Website
Squarespace provides a built-in selection of Adobe Fonts that users can easily use without needing to worry about adding custom fonts. However if the Adobe font you want to use isn’t included in the list of built in Squarespace fonts, then you can add it – assuming you have an active Adobe subscription that gives you access to Adobe Fonts.
If you are already using Adobe Fonts on your local computer, you may be aware that Adobe doesn’t provide you with the actual font file (i.e. the .ttf or .otf file) when you activate a font. (In fact it does technically install the font files to your computer, but it buries the files in a hidden location and also renames the files so they’re hard to find.) Therefore, you won’t be able to follow the steps I provided in my article on how to add custom fonts to your Squarespace website, because you don’t have access to the font file.
Instead, you can go to fonts.adobe.com and log in to your Adobe account. Find the font you want to use, and click on the ‘</> Add to Web Project’ button. You can find this button either on the individual font page, or in the Browse/Search view (see screenshots below). This button will open a popup for you to choose which website (or “Web Project”, as they call it) you want to add this font to.
In the popup, click the project dropdown and click ‘Create a new project’. Then type in a project name for your website directly into the dropdown box, and then click the Create button down at the bottom.
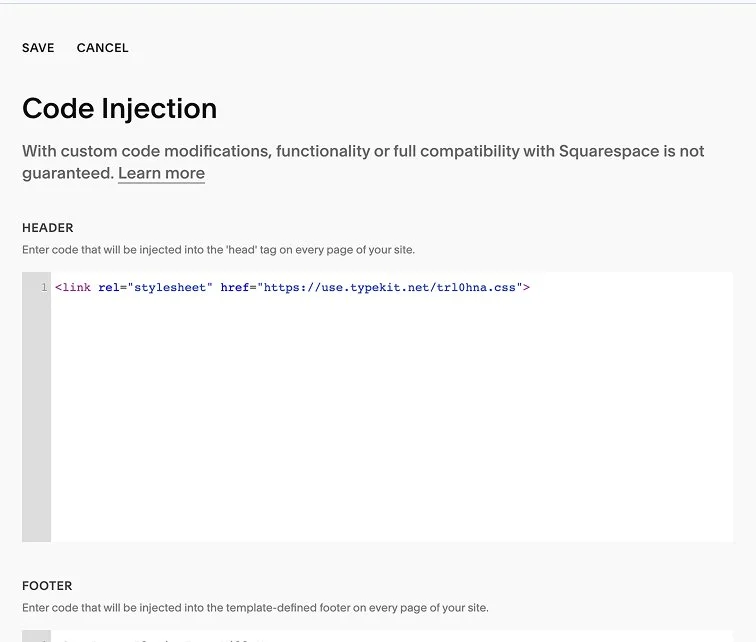
The next popup screen will show you the code you need to add to your website. There are two code blocks here – the first one in the gray box starting with <link rel=”stylesheet”… >, and the second under the “Fonts Added” section towards the bottom includes some CSS code.
Copy the code in the gray box starting with <link rel=”stylesheet”… >. Keep this tab open and don’t close the popup yet – you’ll need to come back to it.
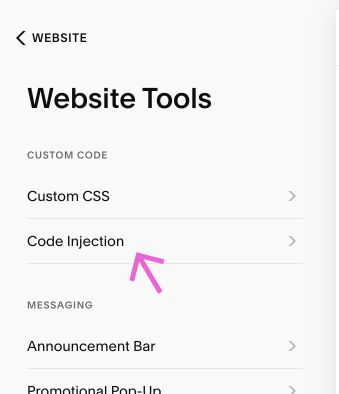
Back in Squarespace, go back to the Website Tools menu and click on Code Injection. In the Header box, paste that <link rel=”stylesheet”… > code. Click the Save button in the top left.
Note that you will need to have a Business plan or Commerce plan in order to access the Code Injection menu. If you don’t, you won’t be able to add custom Adobe fonts to your website. An alternative would be to create the text using the custom font in a program like Photoshop or Canva and export the image with a transparent background, and use an image block to display the text. It’s not an ideal solution and would really only be feasible for heading/display text, but it works if you really don’t want to upgrade to the Business plan.
Next go back to Website Tools and go to Custom CSS. At this point you’ll need to figure out which text styles that you want to apply your custom font to (e.g. Heading 1, Heading 2, etc.). Each text style has a corresponding selector that can be used to reference it in the CSS code:
Heading 1 → h1

Heading 2 → h2

Heading 3 → h3

Heading 4 → h4
Paragraph 1 → .sqsrte-large

Paragraph 2 → p

Paragraph 3 → .sqsrte-small

Monospace → pre

Copy the selector(s) (the green text above, for example h1 for Heading 1, or .sqsrte-large for Paragraph 1) for the text type that you want to apply the font to, then paste it in your CSS code, followed by curly brackets. Inside the curly brackets is where you would paste the second set of code we saw in that popup on the Adobe fonts web page (see screenshot). I would also add !important at the end of each line before the semi-colon to override the styles set by Squarespace.
For example if you want to change the Heading 4 text to use the Adobe font, your CSS code might look like this:
h4 {
  font-family: "cofo-kabeltouw-solid-0", sans-serif;
  font-weight: 400;
  font-style: normal;
}That’s it! You can set the sizes of each of the Headings and Paragraph styles from the Site Styles menu (by clicking the paint brush icon in the upper right corner of squarespace), but if you want to change any other attributes on a per style basis (for example, making Heading 4’s all uppercase, or increasing the font weight of Paragraph 3 but not the other Paragraph styles) then you’ll have to use CSS.
If there are any other styles throughout your site that you want to apply the custom font to (like buttons or blog titles) you’d just need to find out the selector to use for that particular element, and assign the font-family property to it in your CSS code.
I hope you found that helpful! If you did and want to say thanks, consider buying me a coffee ☕️